Many off-grid homes use photovoltaic panels to
convert light into electric power. It's not that hard to set up a solar power system and, once you do, it is really great to have electricity without getting a bill for it every month. That said, it does cost money to get it set up. Some of the components are pretty expensive. Fortunately your system will deliver reliable power to your house for years without outages with proper design and maintenance.
Before we get into how to design your own off-grid solar power system here is some basic information about electricity, in case you don't already understand it.

Electricity is a stream of electrons that moves in a circuit
to produce work of some kind. It is called a circuit because the connections
have to go full circle in order for the electrons to flow. The appliance or
device that will use the power is called a “load.” In the drawing at left, "V" means the power source, "I" is the path of the current, and "R" represents the load. This is the bare minimum for a functional electrical circuit.
An open circuit means there
is a break in this circle and, therefore, no electricity flows and nothing will work. A short circuit
occurs when two parts of the circuit accidentally touch each other between the
power source and the load. Short circuits are dangerous and can
cause sparks, fires, and damage to you and/or your equipment. Fuses and/or
circuit breakers are put into circuits to break the circuit in case of a short
or a power draw that exceeds the capacity of the wiring or equipment.
The wires that carry electricity must be made of materials
that are good conductors. Copper is the most commonly used in wiring but most
metals can conduct electricity. Some non-metals can conduct, too, like water.
This is why you do not want to be standing in water when using electrical
equipment.

Learn this formula: Volts X Amps = Watts.
Voltage is a
measurement of the pressure of electron flow and
Amperage is a measure of the volume of the flow of electrons.
A
Watt is a
measurement of power. That’s the bottom line – how much power you need your system to produce. If you play with this formula you will see that you can get the
same amount of power with 100volts at 10amps as you will with 10volts at 100
amps. You can calculate Volts or Amps by re-working the formula – Amps = Watts
/Volts and Volts = Watts /Amps. You will see how useful this formula is later.
Power use is measured in watt-hours. This is the amount of
power used over time. For example, if you watch TV for three hours each night
and your TV uses 100 watts, that adds up to 300 watt-hours per day of power
needed. A 10-watt appliance that is used for 10 hours a day has the same total power
use as a 100-watt appliance that is used for one hour per day.
Another important thing to know is the difference between
direct current (DC) and
alternating current (AC). With photovoltaic systems
power is produced and stored as DC but is delivered to your house as AC. In the
U.S. AC is approximately 117 volts at 60 cycles per second. The reason AC is used
is that it travels farther than DC without significant power loss.
Interesting Fact: Almost all
electronic devices –radios, computers, etc. –run on direct current. Since
normal house current is AC (because of the ease of AC power transmission).
These devices all contain power supplies to convert house AC to the DC voltage
that is required. The little black
plastic box that is part of your power cord on laptops, etc. is the power
supply.
DC wiring has two leads – a positive and a negative. The
standard is for positive DC wires to be red and the negative is black. If you
stick to this it will make it easier and safer when connecting your equipment
together. Don’t touch a positive and negative connection at the same time! You
can be electrocuted. Just touching one connection will not do anything to you.
AC house wiring normally has three leads. – hot, common, and
ground. The NEC color coding for this is hot=black, neutral or common=white,
ground = either bare copper or green. Not all houses are wired using this color
code, but it’s the standard for the U.S. and Canada. The ground wire is for
safety. It will send the electricity into the ground if there is a short or
malfunction. Once again, do not touch two different connections at the same
time!
 Series vs. parallel
 – There are two ways power sources are
connected together to combine output. With series connections the voltage
multiplies but the amperage stays the same. With parallel connections the
voltage stays the same but the amperage multiplies. You can combine components
like batteries in a combination of series and parallel (called series-parallel)
to get the voltage and power output you need.
The diagram at left shows how to connect four batteries in series or parallel and also shows the result in volts and amps. As you can see, connecting the batteries in parallel gives you the same voltage as one battery but four times the amperage. Connecting them in series quadruples the voltage but the amperage stays the same. Solar panels can be combined in the same ways. You will want to configure your batteries and solar panels to output the voltage you need to match your other equipment.
Off-grid solar power systems consist
of four main components: photovoltaic panels, charge controllers, batteries,
and inverters.
PHOTOVOLTAIC PANELS (PV)
PV panels contain specially grown silicon crystals that give up electrons when
light hits them. It is a very direct way to generate electricity although panels are currently only able to convert about 15% of the light into electricity.
The panels harvest the sunlight and produce DC electricity.
Most panels produce electricity at somewhere
between 12 and 35 volts DC, depending on the panel design. They can be ganged
together in either series or parallel or combinations of the two to produce the voltage and power you need. It is best to match panels to each other by voltage
and wattage as much as you can. Combining dissimilar panels works but is not
optimal. Solar panel power output is rated in watts.

CHARGE CONTROLLERS
These electronic devices make sure that the power coming from the solar panels
goes into the batteries at the correct voltage for the batteries without
over-charging them. Charge controllers go between the solar panels and the
battery array. They also monitor the state of charge in the batteries. If you
want to see the status of your system, the charge controller has the indicator
lights or a screen showing voltage and amperage. Smart charge controllers
have several different charging modes depending on the batteries’ state of
charge. They are designed to deliver the optimum voltage to keep your batteries
charged and happy. You can have multiple charge controllers connected to the
same battery array to handle the input from large panel arrays. Charge
controller capacity is rated in amps.
Batteries store electricity chemically so you can have power when the sun isn’t
shining. Most commonly used are lead-acid deep-cycle batteries. Deep-cycle
means they can handle fairly deep discharges unlike automotive batteries. Car
batteries are designed to have a huge load on them for a very short period of
time – like when your starter is spinning the engine to start the car. Deep-cycle
batteries are designed to have small load on them for a long period of time. There
are two main types used in PV systems – flooded batteries and AGM batteries.
Flooded batteries are the least expensive but they require some maintenance.
You will have to check the electrolyte levels regularly. If the electrolyte is
low, you will have to add distilled water. AGM batteries are sealed units and
do not require maintenance other than making sure the terminals are clean of
corrosion.
Batteries can be connected in series, parallel, or a
combination of the two to produce the voltage the inverter(s) require. When
designing a battery array it is best to have as few parallel connections as you
can. Series connected batteries tend to last longer. Battery power storage
capacity is rated in amp-hours. A two-volt, 1000 amp-hour battery stores 2000
watt-hours of power. (volts x amps = watts.)
Batteries also have longer lives if they spend most of the time close to full charge. Deeply discharging the batteries will shorten their lives. I recommend making sure your batteries are more than sufficient to meet your load requirements and that you have more solar panels than you need to make sure the batteries charge quickly and fully.
 |
| Our inverter is old but works fine. |
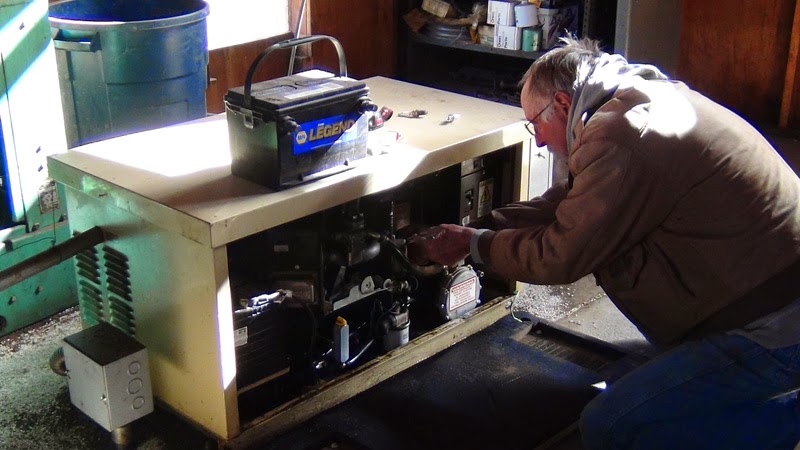
INVERTERS
Inverters are electronic devices that convert DC from the batteries into AC for
your house. They must be purchased to match the output voltage of the battery
array and to produce the amount of power you need for your home. There are two common types of inverters. The modified square-wave inverters are the cheaper
ones. They produce a wave-form that is fine for running motors and lights but
can cause problems when running sensitive electronic equipment. The better
quality ones are pure sine-wave inverters. They produce the cleanest AC power
to keep your electronics happy. Some inverters also have built in battery
chargers for use when your system is running on back-up power, like a
generator.
You can have multiple
inverters connected in parallel to your battery array. Their power delivery
capacity is rated in watts.
Six steps to design a photovoltaic
system for your house.
For the purpose of this article we will design a sample system which happens to be pretty much the same system that we are running here at our house.
STEP 1. CALCULATE YOUR POWER LOAD
Make a chart listing all of you electrical appliances and their power usage.
The first column should be the list of appliances. The second column contains
the amount of power they use. The third column contains the number of hours
each appliance is likely to be in use during one 24-hour period. The fourth column is for watt/hours for each
appliance. That is the number of hours of demand at the power level the
appliance needs. To get watt/hours you multiply the amount of power the
appliance uses by the number of hours the appliance is in use during one full
day. Here is our chart:
All the appliances in your home have listed on them the
amount of power they use at maximum. This is listed either in watts or in amps.
If it is listed in watts, that’s easiest since we will be adding up the amount
of watts your appliances use. If it is listed in amps, you will have to
multiply that number by 120 to get the power use in watts.
The total estimated load for our house is 2000 watt-hours per day.
STEP 2. CALCULATE THE
AMOUNT OF SUN YOU GET IN WINTER
Insolation is the amount of sun you get. It is different in winter as compared
to summer and there are differences in insolation based on the latitude and climate. We
want to know the winter insolation because that is the time of year you get the
least sun. If the system is designed to provide enough power in the winter then
it surely will provide enough power in the summer when there is a lot more
sunshine. The chart here shows winter insolation in the continental U.S. Values are in kilowatt-hours per square meter per day which basically translates to hours of full sun per day. It takes
precipitation averages into account, too.
STEP 3. DETERMINE HOW MANY PV PANELS YOU NEED.
Each panel is rated for nominal output in watts. For example a 100-watt panel
produces 100 watts with full sun. For our sample system you will need to divide the daily load in watt-hours (2000 watt-hours) by the number of hours of full sun in winter (4 hrs. according to the above chart) to get the wattage that needs to be generated by the solar panels = 500 watts.
 |
| Our array - four 175-watt panels |
We had four 175-watt, 24-volt panels donated to us which totals 700 watts of power output. The extra 200 watts will make up inefficiencies in the system. What are these inefficiencies? Each component uses a tiny bit of power, there are minor power losses in the wiring and connections, the solar panels could be a little dirty, stuff like that.
We connected the solar panels in series to produce 96-volts.This is to minimize power loss since our panel array is about 100 feet from the shed with the batteries, etc. in it. You will have to run DC current from your solar panels to
your charge controller and batteries. Here is the link to the power loss tables
again: http://www.solar-electric.com/wire-loss-tables.html
If you are scrounging panels, combining panels with dissimilar voltages and amperages will work but will be less efficient. If at all possible, find panels that have pretty close to the same output. There are often great deals on panels that have been replaced in commercial installations. I just got four additional 175-watt panels for $100 each. That's CHEAP!
STEP 4. DETERMINE BATTERY ARRAY SIZE
Batteries are rated in voltage and amp/hours. Amp/hours means the number of
hours you can draw a set amount of current (amps). Our sample system would require that
the batteries supply 6000 watt-hours to power everything for three days without
sun.
 |
| Our six Rolls-Surrette flooded deep cycle batteries. |
Batteries can be connected together in series, parallel, or a combination of the two. For maximum battery life, series connections are better. We bought six 1050 amp-hour, 2-volt batteries. They are connected in series to produce 12 volts. This totals 6300 watt-hours - more than enough to meet our three-days-without-sun requirement We chose a 12-volt total output because we already had a 12-volt inverter and we needed to match the voltage to that. Inverters are pricy so we figured it was worth designing the system to use the inverter we have.
STEP 5. CHOOSE A CHARGE CONTROLLER
Charge controllers come in two types – PWM and MPPT. PWM stands for pulse-width
modulation and is the cheaper of the two types. The downside to PWM controllers
is that they simply chop off any extra voltage above the nominal input voltage
from the solar panels. For example, it is not unusual for 12-volt nominal
panels to produce 17 volts under full sun. The PWM controller takes 12-volts of
this input and throws away the other 5 volts. Not efficient.
MPPT controllers are better. MPPT stands for Multi-Point
Power Tracking. It constantly checks the output of the panels and adjusts its
capacity to convert whatever voltage the panels are putting out into the
voltage the batteries require without wasting power.
 |
| Our charge controller - 60amp MPPT |
Charge controllers are rated in input voltage, output
voltage, and output amperage. You can adjust the output voltage in most of them
to meet the voltage of your battery array. With our little system we needed our
controller to put out 12 volts to charge the 12-volt battery array. Since the output amperage (not the power) of the charge controller is a limiting
factor, 700 watts (panel array output) divided by 12 volts (battery array
voltage) will mean we need a charge controller that will handle up to 58 amps. Fortunately
Morningstar makes a 60-amp MPPT charge controller. So that's what we bought.
If we had a 48-volt battery array and a 48-volt inverter a 60-amp charge controller could handle four times the solar panels. Why? Because 48-volts x 60 amps is 2880 watts. This is another reason to design your system to run higher voltages. If we wanted that much power to go into our 12-volt system we would need four of these charge controllers. Expensive!
Our charge controller can take any input voltage up to 150VDC and convert it to 12 volts to charge the batteries. Because higher voltage travels with less loss of power we have our four 24-volt solar panels connected in series. The total output from our panels is 96 volts nominal. (They actually can put out quite a bit more voltage under certain conditions but not over 150 volts)
STEP 6. CHOOSE AN INVERTER
The last piece of equipment you need for your system is an inverter to convert
the DC current in the batteries to AC house current to run your appliances. We
have determined our load as 2000 watt/hours. That is not meaningful
for figuring out your inverter size. What you need to estimate is how many
appliances are likely to be on at the same time and total the watts for that. Get an inverter that produces more power than is likely to be used at any one time and you will be good.
We have a 2000-watt inverter. That's equivalent to one 18-amp house circuit. Make sure the inverter you buy
can handle a continuous load at the wattage rating you need and that it produces a pure sine wave so your electronic equipment operates better.
Inverters are matched to battery voltage outputs. There are
four standard voltages – 12v, 24v, 36v and 48v. Buy the inverter that matches
your battery output. Higher voltage inverters don't cost any more than lower voltage ones. We already had a 12-volt, 2000 watt inverter so we had to match everything to that.
As you can see from our system, there is some flexibility in the design. If you have a line on some good equipment for cheap, re-designing the system to use that equipment can save you a lot of money. For our system we managed to get our solar panels donated to us. The inverter was already here so we didn't have to buy that. To create the optimal system I would have designed it differently but free panels and a free inverter meant we only had to buy batteries and a charge controller, which cut our potential system cost nearly in half. It was definitely worth figuring out how to make the free stuff work!
Our system has worked just great since we put it in three years ago. We have not run out of power once and we have all we need even though our system is small.
If you are starting from scratch and have similar power requirements as our system, I would recommend a 48-volt system. I would use the same 60-amp MPPT charge controller I am using now but, instead of the 12-volt battery array, I would get eight 6-volt batteries in series (48 volt total) and get an inverter that can take 48-volt input. With that system you could keep adding solar panels to your array up to a total of 2800 watts, four times the power that our system produces.
HOW MUCH WILL IT COST?
If I were to purchase everything today to build our sample system from scratch here's roughly how it lays out:
Solar panels - anywhere from 60 cents per watt for used commercial panels to over 2 dollars per watt for new ones. Prices have been coming down. Ten years ago new panels were close to 4 dollars per watt. Let's figure you are buying new panels at $2/watt. 700 watts would cost $1400.
Charge controller - I like the Morningstar Tri-Star 60-amp MPPT controller - $500
Batteries - We got Rolls-Surrette batteries because they have a 10-year warranty. Many cheaper batteries only have 2-year warranties. They were about $350 each. For eight of them (the optimal 48-volt system) that would be $2800.
Inverter - I would get an Outback Power 2800-watt, 48-volt pure sine wave inverter. $1900.
Hardware - This includes wire, switches, connectors, etc. - probably $200 to $300.
Panel Rack - You will need a rack to hold your panels. I built my own rack for about $200 in materials. I am a welder so it was no big deal to make it. I don't know what it would cost to have someone make you a rack.
 Shed
Shed - The batteries, charge controller, and inverter need to be in a protected space like a shed. We already had a shed we could put this stuff in so there were no added costs. If you don't have a shed you will have to get or make one. I am leaving the cost of this out of the calculations.
As you can see, the batteries are the most expensive part of the system. They are also the part that wears out fastest. You will have to replace them every 7 to 15 years, depending on how well they were built and how well you maintain them. Badly maintained batteries in a poorly designed system may only give you 2 years of service so it pays to buy the best and take care of them.
If the rest of the equipment is good quality it should last a very long time. There are still solar panels in service that were made in the 1970's. They produce a little less power than when they were new but are still working. The good quality charge controllers and inverters also can last a long time. You will probably not have to replace them. Cheap stuff will likely die quickly and you will have wasted your money. Get the good stuff!
To save money, getting used solar panels and the other equipment is not a bad idea. Test them first to make sure they work. If they do, they are likely to continue to work.
SOLAR POWER CALCULATOR
I believe it is important to understand how your solar power system works. That's why I put all this info here. Once you know how it works and have done your first system design, you can simplify the process by using an online solar power calculator. Here is the best calculator I have found on the internet:
http://www.sunsoglobal.com/calculator.html
It calculates the number of solar panels you need, total charge controller
amperage, and battery array size. Instead of using daily power use and production in watts to design the system, it uses monthly power use in kilowatts. You will have to multiply your daily
load (watt-hours) by 30 and then divide by 1000 to get your monthly average
load in kilowatt-hours.
Now that you have figured out the equipment you will need you will have to install the equipment. That will be the subject of my next article on the subject - Solar Power Basics - Installing Your System.


